Chevette clutch
cable sleeve installation
( Gas and Diesel car )
Clutch cable pulled through the firewall ? No problem ! There is a
little plastic sleeve which is inserted into the metal firewall, and this is what the
cable "pulls" against when you depress the clutch. Occasionally, the plastic
ring can break off, and the cable will not have any leverage to pull against, and you are
stopped until you can get this fixed. ( Your clutch pedal will probably rest close to the
floor, and be useless. Depressing it will do no good. ) In an emergency, you can carefully
work a pair of vice grips in behind the e-clip and washer, between them and the firewall,
and this will work temporarily until you can repair this properly.
First, you'll need some parts. 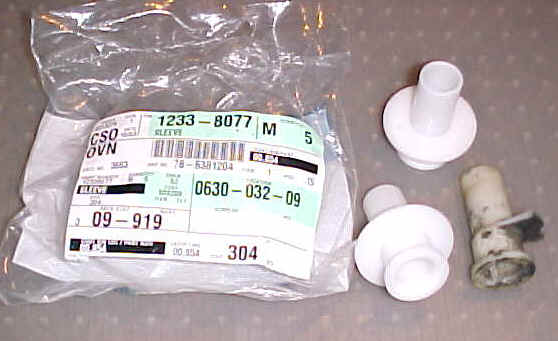 These new clutch cable
sleeves are still available from your friendly GM dealer, under part number:
12338077. You must buy the pack of five. I paid $8.60 for the batch. Gas and Diesel cars
share the same part. That nasty looking broken part is what I extracted from the car. I
had purchased the car with the "vice grip " option intact.
These new clutch cable
sleeves are still available from your friendly GM dealer, under part number:
12338077. You must buy the pack of five. I paid $8.60 for the batch. Gas and Diesel cars
share the same part. That nasty looking broken part is what I extracted from the car. I
had purchased the car with the "vice grip " option intact.
( Thanks to Danny and Shawn on the Chevette Performance Forum for alerting
me to this repair ! )
I suggest getting a mirror and good light, and taking a look up
behind the brackets that hold on your clutch cable to the clutch pedal. The clutch cable
has a simple eyelet which is simply inserted over a hook on the clutch pedal. No retainer
to remove, just reach up behind the clutch pedal assembly, and dis-connect the clutch
cable. Slide the broken plastic sleeve off, noting the way it was installed, and slide the
clutch cable out through the hole in the firewall, into the engine compartment.
Insert the new plastic clutch cable sleeve into the firewall,
small end first, double "ring" side to the engine compartment, and feed the
clutch cable through it. Re-attach the clutch cable inside the car to the clutch pedal.
You may have to remove the adjusting e-clip to do this. You may have to adjust the cable
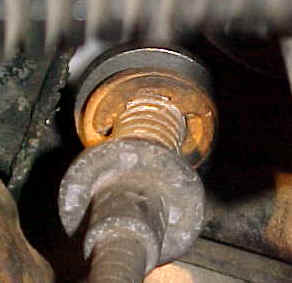
anyway. This e-clip, depicted below is very important, don't lose it ! The e-clip is what
adjusts the clutch cable.
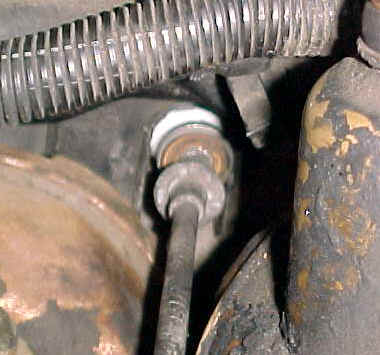
The photo on the right is the finished installation. This is what
your clutch cable sleeve looks like after installation ( into a Diesel car. Special
instructions below ). You must also remove the clutch cable from a simple bracket on the
inner fender panel, and re-insert after installation.
 Very simple, just bend the tabs open and
shut.
Very simple, just bend the tabs open and
shut.
To adjust the clutch cable, you should remove the e-clip, and pull
on the cable, from the engine compartment, with a force of about 35 ft lbs. Replace
the e-clip in the first available groove that you can slide it into, and check for clutch
pedal freeplay. You should have about ¾" of freeplay where the clutch pedal is
lightly resting against the rubber bumper stop inside the car. If it is pressed tight up
against the bumper, or down away from it, you should re-adjust. If you cannot meet these
perimeters, you may need to do a "major clutch pedal adjustment". Consult your
GM Shop Manual.
( Note: I had to install about ½" of extra washers behind my
e-clip to achieve this result. A cheap alternative to replacing the clutch cable, or doing
a "major clutch cable adjustment" ! )
Diesel car instructions:
The Diesel car adds one bit of excitement ( read: complication )
to an otherwise simple job. There is the matter of the extra bulkhead in the way of simply
installing the plastic sleeve:
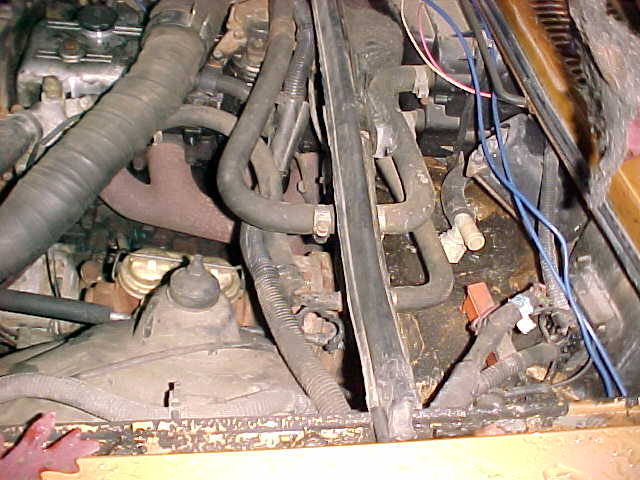
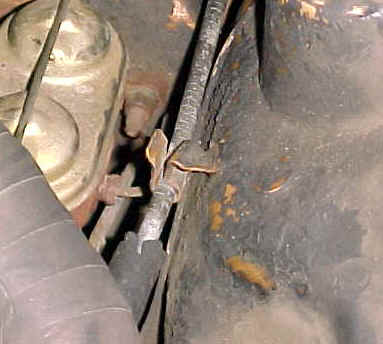
This fun piece of fiberglass has a "U " shaped cut out
area around the sleeve that is not quite large enough to allow simply sliding the sleeve
in place. So, you must loosen these six bolts:
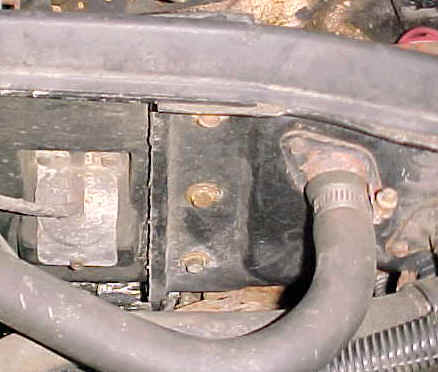
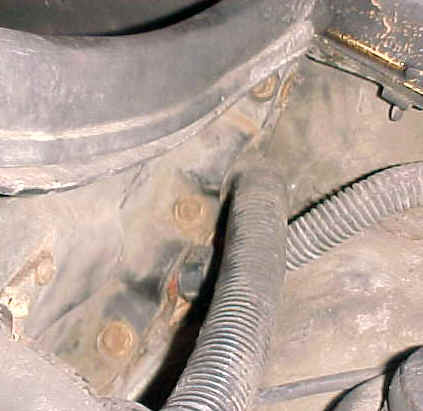
... and carefully lift the whole assembly up to facilitate
insertion of the clutch cable sleeve. You must be very careful, as you have two heater
hoses, and probably some fragile steel tubing to be aware of. Otherwise, you will have to
drain the coolant, and remove quite a bit of hosing to perform this job. Look at the photo
up above, and you will see the "U" shaped cutout area around the white plastic
sleeve.
Ah, the never-ending joy of owning the Diesel Chevette !
Home