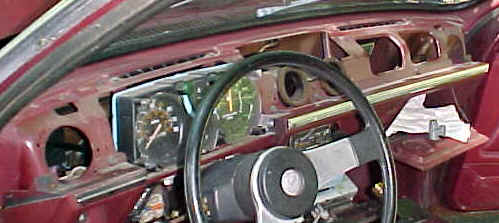
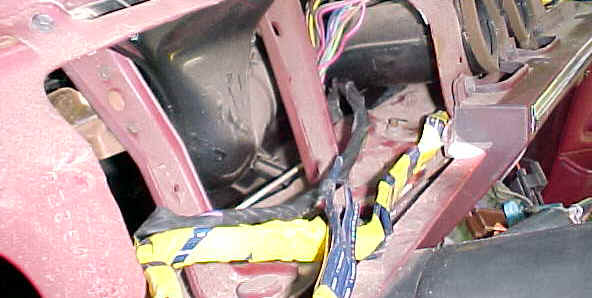
The instrument cluster is still in place in this photo, but it should be moved also. Once all this is out of the way, you will find a nice convenient "tunnel" to run the defroster harness wires through that will make a nice installation.
Chevette
defroster wiring harness installation.
( Pictures kept small to enhance load time )
If your Chevette came without a rear window defroster, take heart, it's not that hard to install ! You will need a few items:
Hatch with rear defroster
Plastic insert with defroster switch. ( That's the piece that goes around the radio and
heater controls.)
Complete underdash wiring harness ( with wires that go
through firewall to circuit breaker, and starter. You
can keep this all in one piece during removal if you're careful ! )
Defroster timer
HD wire that goes from the front to rear via the drivers side door sill sheath
I suppose you *could* install the harness without removing the upper dash pad, instrument cluster and bezel surrounding the radio and heater controls,, but it is FAR easier to do the job right if you get all this out of the way:
The instrument cluster is still in place in this photo, but it should be moved
also. Once all this is out of the way, you will find a nice convenient "tunnel"
to run the defroster harness wires through that will make a nice installation.
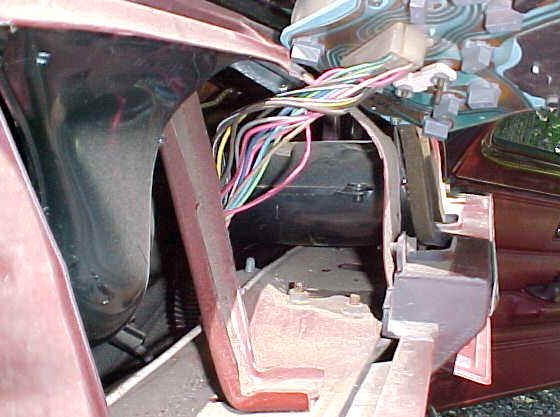
This view is from the drivers side, and shows a ledge of metal right below the
center vent ducts that the defroster wiring harness will travel along. Note the instrument
cluster has been removed, and simply laid aside. After removing the two retaining nuts
along the bottom, reach behind the cluster and push up on the steel retainer holding the
speedometer cable, and this will release the cable. Leave the power connector intact, it
will have plenty of wiring to allow you to move the cluster aside.
GM was nice enough to install this cool latch on the defroster cable that will allow you to easily pull the defroster harness though the dash, starting from the drivers side to the passenger side.
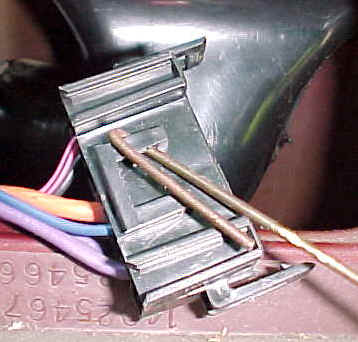
Attach a strong wire to the cable, and pull it through. Carefully. Note the bezel containing the radio is laid out of the way in this right photo. Also, the lighter power connector, and light for the heater controls simply lay out of the way. Nothing is easier to work on than the Chevrolet Chevette !
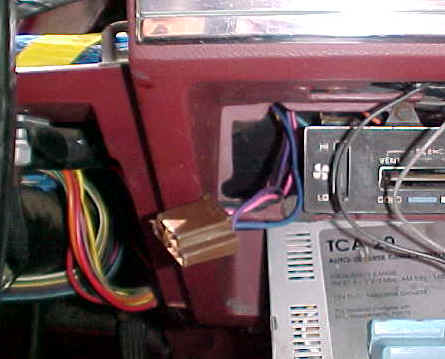
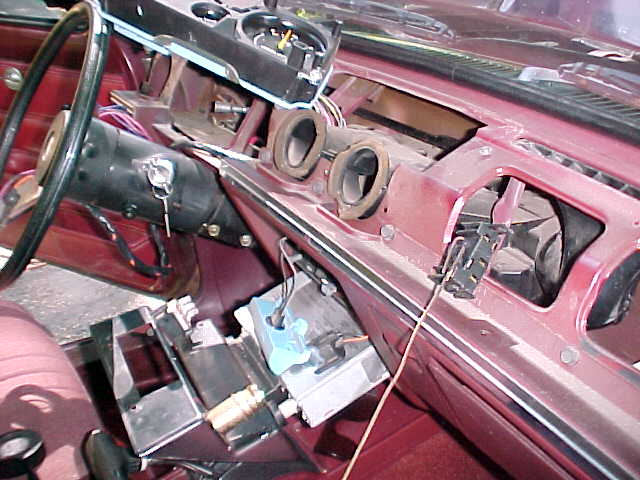
The defroster harness will lay behind the cluster like this. I have added that big blue wire harness for later projects. The black harness is the defroster harness. The photo on the right shows how the connector will come out next to the heater controls to connect to the defroster switch.
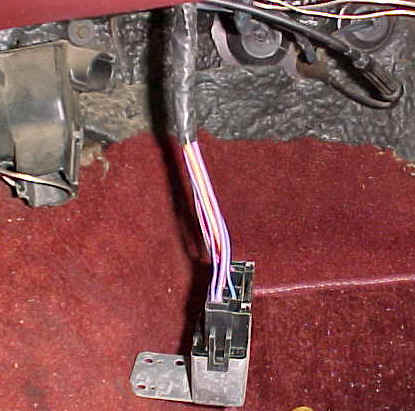
This is the harness as it comes out the passenger side, and connects to the timer. This bolts to the firewall in the background, right next to the heater duct. Try to get it as high as you can so passengers don't kick it. The factory uses "drill bit" lag screws, and just power them in.
The left side of the harness comes out next to the drivers side kick panel, and is retained by wire ties, and the factory has clip retainers behind the kick panel for the wires that go to the back.
Check the harness page for how to connect up the wires. After connecting up all the wires, and running a Heavy Duty 12ga wire to the rear defroster grid, assuming all your parts are functional, you should be in business.