1) Remove radiator, fan shroud, fan, and drive belts.
2) Set No. 1 cylinder at top dead center. (TDC)
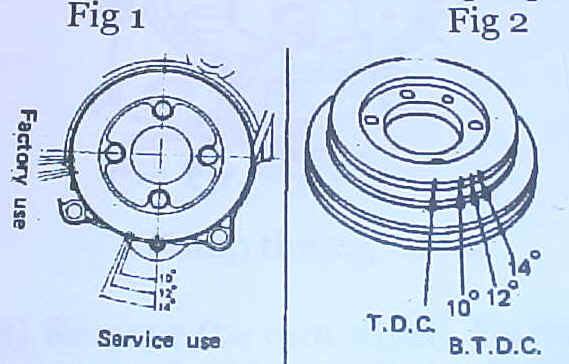
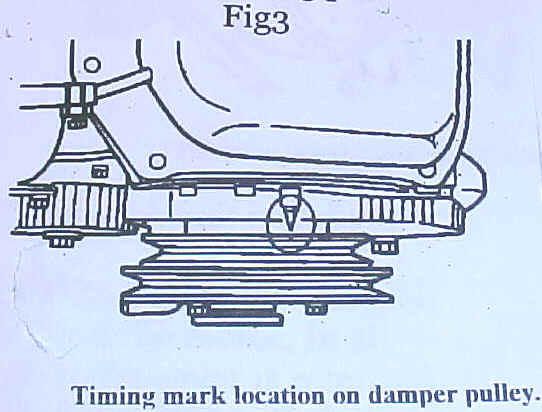
Timing mark location on dampener pulley
Front view Rear view Bottom view
Here After do not disturb crankshaft from TDC !!!
3) Use socket (36MM?) wrench on crank nut and turn till TDC mark on crankshaft damper pulley aligns with timing pin.
4) Remove crankshaft damper pulley. Once the four bolts are removed, you should be able to pop it off by tapping; around it’s edge, gently with a small hammer.
5) Remove upper dust cover. Use care with gasket- I understand they are no longer available.
6) Remove lower dust cover. If gasket falls apart- perhaps you can use a bead of silicone for replacement. Maybe allowing it to partially solidify before putting on the dust covers.
If all is in alignment, steps 7 and 9 should fall in place to conform that the engine is indeed at TDC
7) Note that the injector pump has an alignment mark at about 10 O’ Clock. It should match the mark on the back plate.
Place a locking bolt 10mm 1.5 mm about 40 mm long (1.5 inches) in the sprocket hole located at about 4 O’ Clock. Isn’t it great when everything lines up?
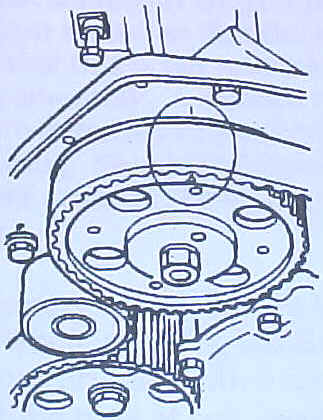
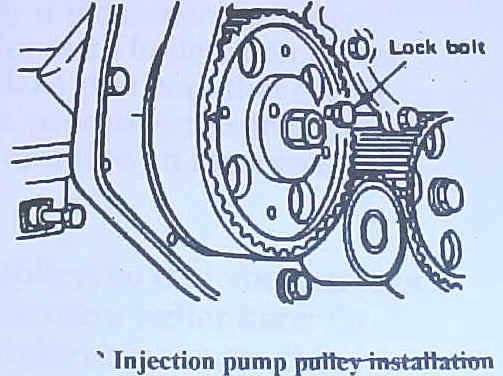
Fig 4
Fig 5
Pump timing marks
Pump lock bolt installation
8) Remove the cam cover. Do not lose the "half moon" shaped piece of rubber at the back, down behind the motor. In all likelihood it will remain in the cover as the cover is removed. New cam cover gaskets are available. Kit comes with " Half Moon," shaped rubber.
9) I know you don’t have the manufacture suggested j-29761 fix plate as shown in Fig 6 [if you have two I’ll buy one] I took a 4 inch piece of 3/16 (.1875") x 1" cold roll and ground off about .007 for the area of the fit. (.180).
Fig 6
Cam shaft fixing plate installation
See note 2, ( last page)
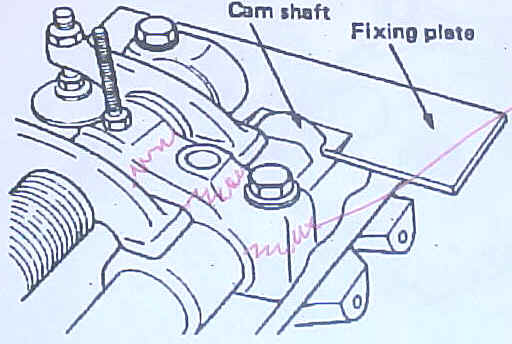
Insert plate in the slot at rear of camshaft lying if flat atop the heat casting. Hey does it fit snuggly you are in alignment! And life is good!
I note that some may suggest here, that you should loosen the valve adjustment screws so that the rocker arms are in a free state. I suggest that this is not necessary. Especially if the motor has been running smoothly. A smooth running engine is an indication that the valves are currently in good adjustment. Make sure here that the fix plate is sung. Should it drop out during this process? The pressure of the rocker arms on the loves may snap the cam into an incorrect position.
It is necessary here to loosen the camshaft pulley, so that you can turn it really when installing the new belt. You can use a puller here. Or maybe tap carefully with a small hammer. To be able to run this pulley at the time of belt installation, allows the cogs of the new belt to better fall into place when taking up all slack.
10) Disconnect the tensioning pulley spring located on the opposite side of the mounting plate - just below the front of the injection pump. Push the bottom of the leaf spring inward toward the engine. When it clears the notch on the retaining pin, move it to your left to set of off the pin. Loosen the three bolts of the tensioning pulley only sufficiently to allow it to swing. The two small bolts and the larger one in the middle of the pulley. This tensioning pulley is where you will take up all slack.
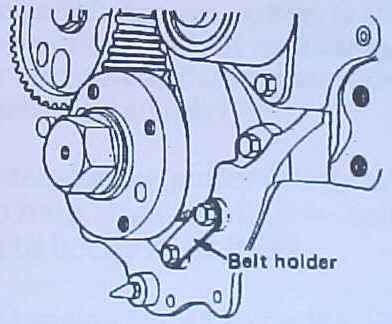
11) Remove belt holder located at crankshaft
12) Remove timing belt.
Fig 8
Belt holder view13) Install new timing belt. Se sequence Figure 9.
Fig 9
Timing belt installation sequence
See note 3, (last page)
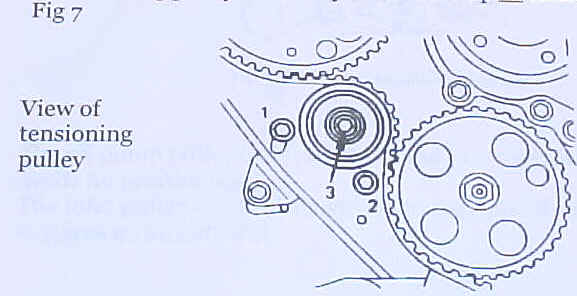
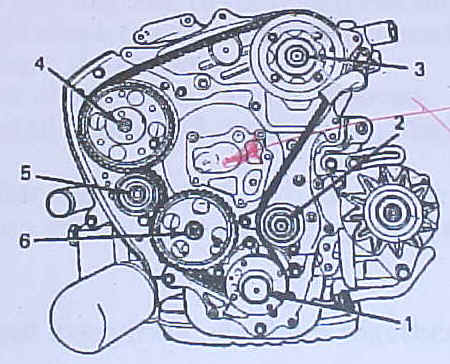
The oil pump pulley (Item 6) above and to the left of the crank pulley needs no positioning
The idler pulley (item 2) above and to the right of the crank pulley requires no adjustment.
14) Concentrate all belt looseness at tensioning pulley. Push pulley into belt firmly. Hold briefly with bolts 1 and 2 while reinstalling tensioning leaf spring.
15) Set on crankshaft damper pulley. Is crank at TDC??????
16) Does pump pulley lock bolt turn easily? -Not Jammed?
17) Does your homemade fixing plate move in and out of the camshaft lost easily and snugly?
18) Loosen bolts of tensioning pulley briefly and make sure the slack is all taken up here. Tighten all three bolts. 1 and 2 to bet 11 and 18 Ft. lbs. No. 3 to bet 47 to 61 ft- lbs.
19) Check belt tension for 47 to 64 lbs. Or, I think, press down on belt between pump and cam pulleys for approx. 1/8" depression
20) Remove crankshaft dampener and install belt holder.
At this point- I have this habit of turning the crank over with my wrench, a full 360 degrees, to see if all turns smoothly. At this point one could check the rocker arm shaft bracket bolts for looseness. Torque if necessary.
21) And put everything else back together.